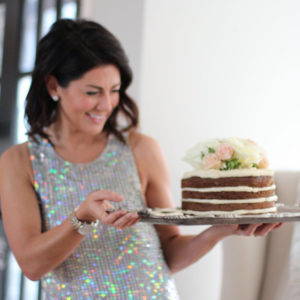
I made this Naked Gingerbread Cake with Cream Cheese Icing for the sweetest, most generous and talented person I know for her birthday (TODAY!), my cousin and best friend Jillian! Of COURSE her dress matched the cake – how perfect!!! Sigh, can she get any more gorgeous? I simply love this human so much my heart could burst!
Needless to say, it is a ritual that I make her birthday cake every year. But I confess, I’ve always found that icing the cake can be so tricky, and half of the time it never turns out exactly how I pictured it. Problem solved: enter the naked cake! As fun as it sounds, this cake is SO easy to make and will impress the pants off of your guests (no pun intended).
This cake recipe is from the cookbook ‘At The Tomato’ by Diane Clement. I would have made up my own but I’ve learned not to mess with perfection. While you don’t absolutely need a piping bag, I would strongly recommend it as you will get a much neater edge on your icing. You can either leave the icing clean between the layers (i.e.: don’t touch it) or you can take a cake spatula and spread it around the sides of the cake creating a smudged and very cool effect. I used fresh flowers for a simple elegant cake topper, but you can use sugared cranberries or whatever your little heart desires!
Gingerbread Cake:
- 14 oz. (398 ml) can of applesauce, or your own
- 1 cup cooking molasses
- 2 tsp. baking soda
- 3 cups all-purpose flour
- 1/2 tsp. salt
- 2 tsp. ground ginger
- 1 1/2 tsp. ground cinnamon
- 1/2 tsp. each ground cloves and nutmeg
- 4 large eggs
- 1 1/3 cups sugar
- 2/3 cup vegetable oil
Directions:
- Preheat the oven to 350F and grease and flour two round baking pans (6-8″ depending on how high you want the cake to be)
- In a small saucepan, bring the applesauce to a boil. Add the molasses and baking soda, blending well. Cool.
- In a large bowl combine the flour, salt and spices.
- In another large bowl (or a Kitchen Aid mixmaster), beat the eggs until light and creamy. Gradually add the sugar and continue to beat until they are thick and golden, then slowly add the oil.
- Fold in the flour mixture alternately with the applesauce mixture. Pour into the prepared pans and bake for about 45 minutes or until the centre springs back to the touch and a toothpick inserted in the centre comes out clean.
- Cool the cakes in the pans before turning onto a cooling rack. Cool completely before icing.
Cream Cheese Icing:
- 2 packages (8 oz each) cream cheese
- 1/2 cup softened butter
- 2 tsp. vanilla
- 4-5 cups icing sugar
Directions:
- In a medium bowl using an electric mixer, beat the cream cheese, butter and vanilla well until light and fluffy on medium high speed.
- Slowly add the icing sugar (starting with 4 cups, adding more if you feel that you need a stiffer icing), beating until the icing is smooth.
Putting it all together:
- Using a long serrated knife, cut the cakes equally in half length-ways so that you have 4 layers all together. Keep the knife parallel to the counter to ensure that you get even layers.
- Carefully separate the layers and, place the first layer on the centre of a cake pedestal. Using a large piping bag fitted with a large round tip, fill the bag with icing and evenly ice the bottom layer of the cake, starting at the outside edge and working your way to the centre. Place the next layer neatly on top of this layer (gently shake the next layer before applying to avoid crumbs from sticking on the icing), and repeat.
- Once you have iced the top layer, use a large baking spatula to evenly smooth the icing around the top of the cake (ending at the edge). Decorate the top of the cake as you wish.
- At this point you may either leave the cake as is and take a flat pastry cutter or flat metal baking spatula to spread the icing around the sides of the cake to create a ‘smudged’ effect. Or you can leave it, completely up to you!
HAPPY BIRTHDAY MY SWEET JILLY BEAN! xo